Aquarium Filter Guide for Planted Tanks
Filtration is essential for planted aquariums, providing biological filtration (nitrogen cycle), mechanical filtration (water clarity), and circulation (nutrient/CO₂ distribution). This comprehensive guide covers everything from filter mechanics to advanced optimization techniques.
What you'll learn:
- Complete filtration theory (biological, mechanical, chemical processes)
- Filter type comparison (HOB, canister, sponge, internal, sumps)
- Selection criteria for planted tanks (flow rate, media capacity, CO₂ considerations)
- Filter media optimization (types, arrangement, lifespan)
- Flow rate calculations and distribution strategies
- Maintenance protocols (frequency, techniques, dos and don'ts)
- Troubleshooting filtration problems
- Advanced techniques (multiple filter setups, inline equipment, custom modifications)
- Planted tank specific considerations (CO₂ retention, gentle flow)
Prerequisites: This guide assumes basic planted tank knowledge. For beginner-level filter information, see Choosing a Filter.
Understanding Filtration Types
Biological Filtration (Most Critical)
What it is: Beneficial bacteria converting toxic compounds into less toxic forms
The process:
- Nitrosomonas bacteria oxidize ammonia (NH₃) to nitrite (NO₂⁻)
- Nitrobacter bacteria oxidize nitrite to nitrate (NO₃⁻)
- See Water Parameters Guide for detailed nitrogen cycle mechanics
Where bacteria colonize:
- Filter media (primary location)
- Substrate surface
- Tank walls
- Hardscape surfaces
- Plant surfaces
Requirements for bacterial growth:
- Oxygen (aerobic process)
- Surface area (porous media ideal)
- Continuous water flow (brings oxygen and food)
- Stable temperature (72-82°F optimal)
- Time (colonies take 4-8 weeks to fully establish)
Why it's critical: Without biological filtration, ammonia and nitrite accumulate to toxic levels. This is the #1 function of aquarium filters.
Mechanical Filtration
What it is: Physical removal of particulate matter
What it removes:
- Uneaten food particles
- Fish waste (solid portions)
- Plant debris
- Dust and sediment
- Algae fragments
How it works: Water passes through progressively finer media, trapping particles
Benefits:
- Crystal-clear water
- Reduces organic load (prevents decomposition into ammonia)
- Protects biological media (prevents clogging)
Media progression:
- Coarse prefilter (removes large debris)
- Medium sponge (catches mid-size particles)
- Fine floss (polishes water)
Chemical Filtration (Optional)
What it is: Using adsorbent materials to remove dissolved compounds
Common chemical media:
Activated carbon:
- Removes tannins (yellow water color)
- Removes dissolved organics
- Removes medications after treatment
- Removes chlorine (though dechlorinator easier)
- Lifespan: 2-4 weeks before saturation
Purigen (Seachem):
- Removes dissolved organics
- Regenerable (can recharge with bleach)
- Doesn't remove trace elements like carbon
Phosphate removers:
- Not recommended for planted tanks (plants need phosphate)
For planted tanks: Chemical filtration rarely needed long-term
When to use:
- After medication treatment (remove medication residue)
- Removing stubborn tannins (if undesired)
- Short-term use only (2-4 weeks)
Don't use long-term: Carbon removes trace elements plants need. Skip for established planted tanks.
Filter Types: Complete Comparison
Hang-On-Back (HOB) Filters
Design: External box hanging on tank rim, intake siphons water up, returns via waterfall
Advantages:
- Easy installation (no plumbing)
- Easy maintenance (accessible from top)
- No tank space used
- Affordable ($20-80)
- Good for beginners
- Visible operation (easy to monitor)
Disadvantages:
- Visible equipment (aesthetics)
- Waterfall noise (can be minimized)
- Surface agitation (degasses CO₂ in high-tech tanks)
- Limited biological media capacity
- Can overflow if intake clogs
Best models for planted tanks:
- AquaClear series (20, 30, 50, 70) - Adjustable flow, excellent media capacity, no cartridges
- Seachem Tidal (35, 55, 75, 110) - Self-priming, adjustable flow, surface skimmer
- Fluval C-series - Good media capacity
Avoid: Cartridge-based HOBs (Marineland, Tetra Whisper) - Replacing cartridges removes beneficial bacteria, expensive long-term
Flow rate recommendations:
- 10-20 gal: AquaClear 20 (100 GPH)
- 20-40 gal: AquaClear 50 (200 GPH)
- 40-70 gal: AquaClear 70 (300 GPH)
Planted tank modifications:
- Reduce surface agitation: Attach spray bar to output or position output at water surface angle (reduces CO₂ loss)
- Add pre-filter sponge to intake (prevents shrimp/fry from being sucked in, reduces maintenance frequency)
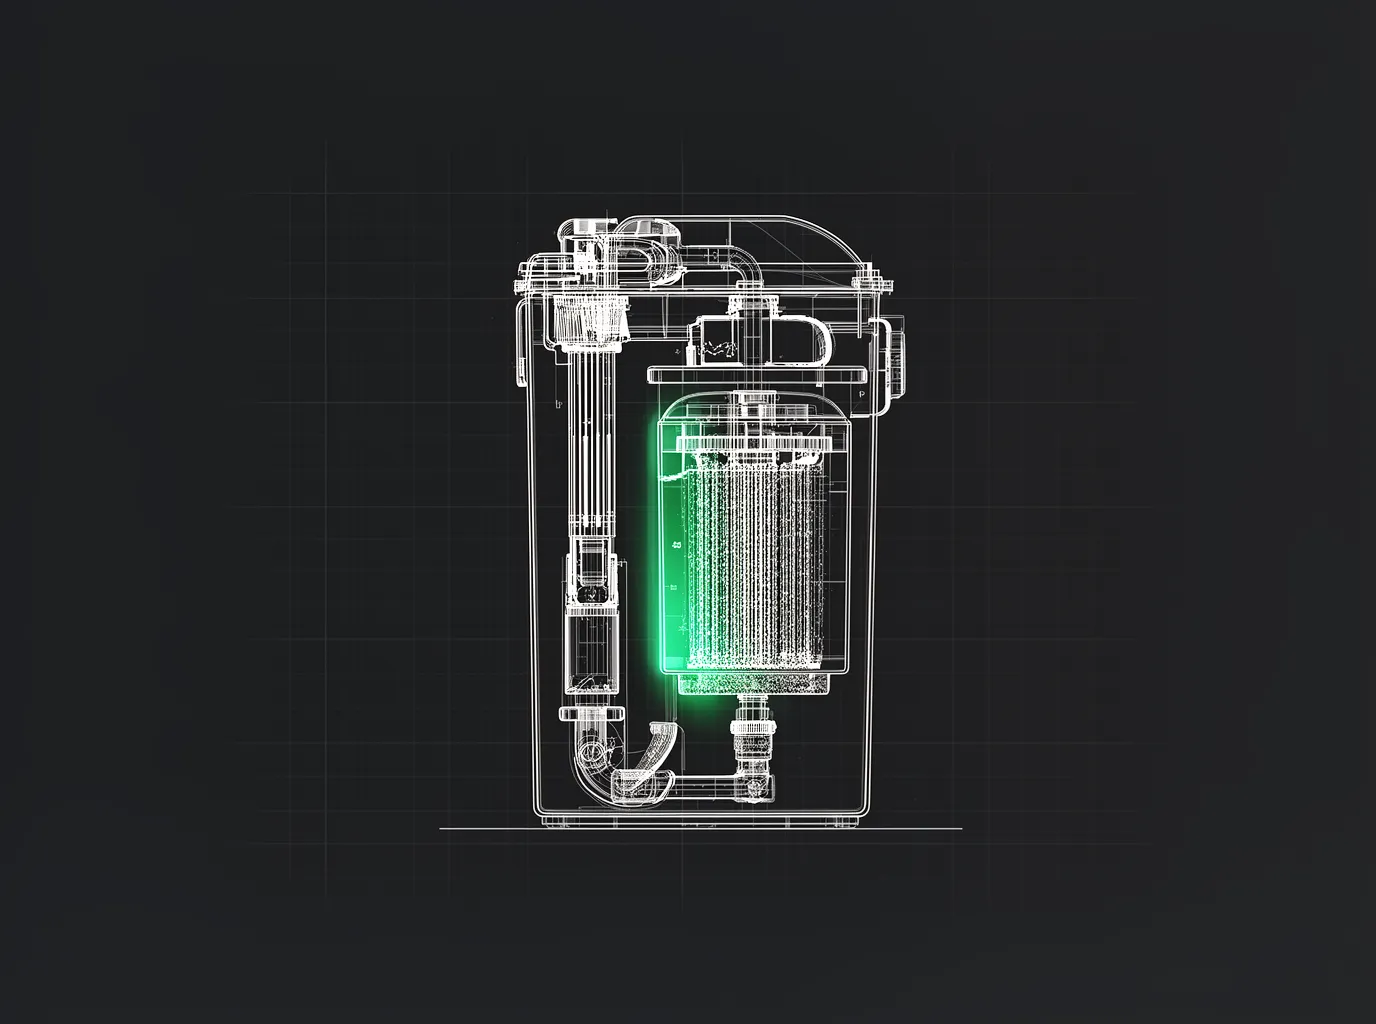
Canister Filters
Design: External cylinder sitting below tank, connected via intake/output hoses, water pumped through stacked media trays
Advantages:
- Hidden (excellent aesthetics)
- Very quiet operation
- High biological media capacity
- Adjustable flow (usually)
- Spray bar/lily pipe compatible
- Ideal for planted tanks (versatile output options)
- Suitable for large tanks
Disadvantages:
- More expensive ($80-300)
- Takes up cabinet space
- More complex setup (hoses, priming)
- Harder to access for maintenance
- Can leak if seals fail (rare, but possible)
- Self-priming or manual priming required
Best models for planted tanks:
Budget ($80-120):
- SunSun HW-302/303/304 series - Good value, functional
- Penn-Plax Cascade series - Affordable, adequate
Mid-range ($120-200):
- Fluval 07 series (107, 207, 307, 407) - Reliable, self-priming, easy maintenance
- EHEIM Classic series - Legendary reliability, simple design
- Aqueon Quietflow Canister
Premium ($200-400):
- Oase BioMaster - Advanced features, pre-filter, heater integration option
- Fluval FX series (FX4, FX6) - Very large tanks, high capacity
Flow rate recommendations:
- 20-40 gal: Fluval 107 or 207 (160-206 GPH)
- 40-75 gal: Fluval 307 or 407 (280-383 GPH)
- 75-125 gal: Fluval FX4 (700 GPH) or Oase BioMaster 600
Planted tank setup:
- Use spray bar: Distributes flow gently across tank back
- Or use lily pipes: Glass pipes for minimal surface agitation + aesthetics
- Position intake: Low in tank, away from CO₂ diffuser
- Position output: Horizontally across tank, slight downward angle
Sponge Filters
Design: Air-driven, sponge provides both mechanical and biological filtration
Advantages:
- Extremely affordable ($5-20)
- Gentle flow (safe for fry, shrimp)
- Excellent biological filtration (entire sponge is biofilm)
- Nearly indestructible
- Easy maintenance (squeeze out in bucket)
- No intake risk (shrimp-safe)
Disadvantages:
- Visible in tank
- Requires air pump (additional equipment, noise)
- Limited mechanical filtration (coarse)
- Bubbles create surface agitation (degasses CO₂)
- Not aesthetically pleasing
Best for:
- Shrimp tanks (primary use)
- Breeding/fry tanks
- Quarantine/hospital tanks
- Supplemental filtration (backup to main filter)
- Nano tanks with low bioload
Models:
- Aquarium Co-Op sponge filters - Various sizes, quality build
- Hikari Bacto-Surge - Excellent flow design
- Hydro Sponge - Classic, proven design
Planted tank consideration: Bubbles degas CO₂. In high-tech tanks, use low airflow or as secondary filter only. In low-tech tanks, bubbles beneficial (increase oxygen).
Internal Filters
Design: Submersible filter sits inside tank
Advantages:
- Compact
- Affordable
- Easy setup
- Good for small tanks
Disadvantages:
- Takes up tank space
- Visible (poor aesthetics)
- Limited media capacity
- Harder to clean in place
Best for:
- Nano tanks (5-15 gallons)
- Temporary setups
- Quarantine tanks
Not ideal for: Display planted tanks (better options available)
Sump Filtration
Design: Separate tank below display tank, connected via overflow and return pump
Advantages:
- Maximum biological and mechanical filtration capacity
- Equipment hidden (heater, CO₂ equipment, etc.)
- Easy to customize media
- Large water volume (increases stability)
- Professional appearance
Disadvantages:
- Expensive and complex ($200-500+ for setup)
- Requires drilling tank or overflow box
- Takes significant space
- Noise from overflow (can be minimized)
- Over-engineered for most planted tanks
Best for:
- Very large tanks (100+ gallons)
- Advanced hobbyists
- High-tech setups with lots of equipment
- Reef tanks (more common) transitioning to planted
Planted tank consideration: Typically overkill. Canister filters provide sufficient filtration for most planted setups without sump complexity.
Filter Selection for Planted Tanks
Flow Rate Calculation
Traditional rule (fish-only tanks): 5-10× tank volume per hour
Planted tank rule: 3-5× tank volume per hour
Why less flow?
- Plants prefer gentle water movement
- Excessive current stresses plants (bends stems, uproots shallow-rooted species)
- High flow increases CO₂ degassing
Example calculations:
40-gallon tank:
- Minimum: 40 × 3 = 120 GPH
- Maximum: 40 × 5 = 200 GPH
- Target filter: 150-200 GPH
75-gallon tank:
- Minimum: 75 × 3 = 225 GPH
- Maximum: 75 × 5 = 375 GPH
- Target filter: 250-375 GPH
Manufacturer ratings caveat: Advertised GPH assumes no media, no head height, clean filter. Actual flow is 20-40% lower. Choose slightly higher rated filter to compensate.
Factors Affecting Filter Choice
1. Tank size
- Obvious primary factor
- Larger tanks need more filtration capacity
2. Bioload
- Heavy fish stock needs more biological capacity
- Lightly stocked tanks can use smaller filter
3. Plant density
- Heavily planted reduces filtration needs slightly (plants process some waste)
- Lightly planted requires robust filtration
4. Tech level
- Low-tech: HOB or canister both fine
- High-tech: Canister preferred (better CO₂ retention with spray bar/lily pipes)
5. Budget
- HOB: $20-80
- Canister: $80-300
- Both effective, choose based on budget and aesthetics
6. Aesthetics
- If equipment visibility matters: Canister
- If hidden equipment less important: HOB acceptable
Multi-Filter Setups
When to use multiple filters:
Scenario 1: Very large tanks
- 100+ gallons
- Two medium filters better than one oversized
- Redundancy (if one fails, other maintains some filtration)
Scenario 2: Uneven aquascaping
- One side heavily planted, other side open
- Position filters strategically for even circulation
Scenario 3: High bioload
- Heavily stocked tank
- Additional biological capacity needed
Scenario 4: Backup filtration
- Main canister + small sponge filter
- If canister fails, sponge maintains basic filtration until repair
Example: 75-gallon planted tank
- Main: Fluval 307 canister (280 GPH)
- Supplemental: Medium sponge filter (gentle circulation, backup bio)
- Total: Well-distributed flow, redundancy
Filter Media: Types and Optimization
Mechanical Media (First Stage)
Purpose: Trap particles before they reach biological media
Types:
Coarse sponge:
- First line of defense
- Catches large debris (uneaten food, plant clippings)
- Rinse weekly or bi-weekly
Medium sponge:
- Catches mid-size particles
- Primary mechanical layer
- Rinse monthly
Fine filter floss/pad:
- Polishes water (removes fine particles)
- Clogs quickly
- Replace/rinse every 2-4 weeks
Prefilter sponge (intake):
- Prevents large debris from entering filter
- Reduces maintenance frequency
- Essential for shrimp tanks (prevents sucking in shrimp)
Maintenance: Rinse in old tank water during water changes. Replace only when physically deteriorating (1-2 years typical).
Biological Media (Core Filtration)
Purpose: Provide maximum surface area for beneficial bacteria colonization
Types:
Ceramic rings/cylinders:
- High surface area (porous)
- Durable (lasts years)
- Standard in most filters
- Good balance of performance and cost
Bio balls:
- Large surface area
- Good flow-through
- Common in wet/dry filters and sumps
- Less efficient per volume than ceramic
Sintered glass (Eheim Substrat Pro, Seachem Matrix):
- Extremely high surface area (macro and micro pores)
- Long-lasting
- Premium option
- More expensive but excellent performance
Sponge (dual-purpose):
- Provides both mechanical and biological filtration
- Good bacteria colonization
- Affordable
- Replace every 1-2 years when deteriorating
Maintenance:
- Rinse gently in old tank water only if visibly clogged (every 2-3 months)
- Never rinse in tap water (chlorine kills bacteria)
- Never replace unless physically breaking down (5-10+ year lifespan)
Critical: Beneficial bacteria colonies take weeks to establish. Replacing biological media restarts nitrogen cycle.
Chemical Media (Optional)
Activated carbon:
- Use temporarily (medication removal, tannin removal)
- 2-4 weeks then remove (becomes saturated)
- Removes trace elements if used long-term
Purigen:
- Removes dissolved organics
- Regenerable with bleach
- Can use longer-term than carbon
For planted tanks: Skip chemical media unless specific need. Plants and bacteria handle organics adequately.
Media Arrangement Strategy
Optimal flow path: Mechanical → Biological → Chemical (if using)
Rationale:
- Mechanical media traps particles before they clog biological media
- Biological media gets clean, oxygen-rich water
- Chemical media polishes water as final stage
Example canister media arrangement (bottom to top):
- Intake stage: Coarse sponge (catches large debris)
- Lower trays: Ceramic rings or sintered glass (biological)
- Middle trays: More biological media
- Upper tray: Fine floss or polishing pad (mechanical, replace regularly)
- Optional top: Carbon or Purigen (temporary use only)
HOB media arrangement (water flow path):
- First: Prefilter sponge
- Second: Biological media (ceramic rings)
- Third: Fine sponge or floss
Flow Distribution and Circulation
Goals of Circulation
1. Nutrient distribution
- Fertilizers spread evenly
- All plants access nutrients
2. CO₂ distribution
- Dissolved CO₂ reaches all areas
- No CO₂-depleted zones
3. Debris suspension
- Waste particles lifted to filter intake
- Prevents settling in dead zones
4. Oxygen distribution
- Especially important at night (plants consume oxygen)
- Surface gas exchange distributed throughout tank
5. Temperature uniformity
- Heater warmth distributed evenly
- Prevents cold spots
Output Placement Strategies
Spray bar (canister filters):
- Horizontal bar with holes
- Mount on back wall
- Position 2-3 inches below surface
- Angle slightly downward (pushes water across substrate)
- Best for planted tanks: Gentle, even distribution
Lily pipes (glass intake/output):
- Aesthetic glass pipes
- Position output horizontally
- Creates gentle, broad flow pattern
- Minimal surface agitation (excellent for CO₂ retention)
- Popular in aquascaping
Standard output nozzle:
- Comes with most filters
- Adjustable direction
- Point at glass to deflect flow (reduces direct plant impact)
- Avoid pointing at surface (increases CO₂ loss)
Surface skimmer (optional):
- Removes surface film
- Some HOBs (Seachem Tidal) have built-in skimmer
- Or add separate surface skimmer
- Useful if film develops (biofilm, protein buildup)
Intake Placement
Positioning:
- Opposite end from output (creates circulation across tank)
- Low in tank (pulls debris from substrate)
- Away from CO₂ diffuser (avoid sucking up CO₂ bubbles directly)
Prefilter sponge:
- Always recommended
- Prevents shrimp from being sucked in
- Catches large debris before filter
- Reduces filter maintenance
Circulation Patterns
Ideal pattern: Gentle circular flow
- Output on one end creates current
- Water flows across tank
- Returns to intake on opposite end
- Plants sway gently (indicates good flow)
Check for dead zones:
- Drop food pellet in various spots
- Pellet should drift toward intake
- If stationary, dead zone present
Fix dead zones:
- Adjust output angle
- Reposition hardscape (if blocking flow)
- Add supplemental circulation (powerhead or second filter)
Filtration and CO₂ Balance
The Challenge
Filters create water movement, which can degas CO₂.
Surface agitation (waterfalls, bubble streams) releases dissolved CO₂ to atmosphere.
You need filtration for biological filtration and circulation.
But you want to minimize CO₂ loss in high-tech tanks.
Solutions for CO₂ Retention
1. Reduce surface agitation
- Use spray bar positioned below surface (not breaking surface)
- Use lily pipes (minimal surface disturbance)
- Reduce HOB waterfall height (lower water level slightly)
2. Direct output horizontally
- Don't aim upward at surface
- Horizontal flow minimizes surface break
- Still provides circulation
3. Avoid air-driven filters as primary
- Sponge filters create bubbles (heavy degassing)
- Use as supplemental only in CO₂ tanks
4. Gentle flow rate
- 3-4× turnover sufficient (not 10×)
- Excessive flow increases gas exchange
5. CO₂ injection compensation
- Increase bubble rate slightly to offset losses
- Monitor with drop checker
- Adjust to maintain 20-30 ppm
Reality check: Gentle surface agitation is acceptable and beneficial (oxygen exchange at night). Goal is minimize, not eliminate. Complete glass-like surface reduces oxygen availability.
Filter Maintenance Protocols
Weekly Tasks
Visual check:
- Filter running properly?
- Flow rate normal (not reduced)?
- Spray bar not clogged?
- Intake not blocked?
Time: 30 seconds
Monthly Tasks (Standard Maintenance)
1. Rinse mechanical media
- Remove coarse/medium sponges
- Squeeze out in bucket of old tank water (never tap water)
- Replace in filter
2. Check flow rate
- If noticeably reduced, clean more thoroughly
3. Clean intake
- Remove prefilter sponge
- Rinse in old tank water
- Check intake tube for blockage
Time: 15-20 minutes
Every 2-3 Months
1. Rinse biological media (if needed)
- Only if visibly clogged
- Gently swish in old tank water
- Don't scrub (preserves bacteria)
2. Clean impeller (canister)
- Remove impeller assembly
- Rinse impeller shaft and housing
- Check for debris or algae buildup
3. Check all connections (canister)
- Hoses secure?
- Any cracks or leaks?
- Lubricate O-rings if dry (petroleum jelly)
Time: 30-45 minutes
Every 6-12 Months
1. Complete filter teardown
- Remove all media
- Clean housing thoroughly
- Inspect all parts
- Replace worn components (O-rings, gaskets)
2. Replace mechanical media if deteriorating
- Sponges falling apart?
- Filter floss compressed beyond use?
Time: 60-90 minutes
What NOT to Do
Never:
- Rinse media in tap water (kills bacteria)
- Replace all media at once (restarts cycle)
- Turn off filter for extended periods (bacteria die after ~2 hours without flow)
- Over-clean biological media (leaves some beneficial bacteria intact)
- Skip maintenance for months (clogging reduces effectiveness, can cause filter failure)
Troubleshooting Filter Problems
Problem: Reduced Flow Rate
Causes:
- Clogged mechanical media
- Clogged intake
- Impeller dirty or damaged (canister)
- Air in canister (needs burping)
Solutions:
- Rinse mechanical media
- Clean intake and prefilter sponge
- Clean impeller
- Tilt/shake canister to release trapped air
Problem: Filter Noisy
Causes:
- Impeller dirty (rattling)
- Air in system (gurgling)
- Vibration against surface (humming)
- Low water level (HOB waterfall splash)
Solutions:
- Clean impeller
- Burp canister (release air)
- Place foam pad under canister
- Raise tank water level
Problem: Filter Leaking (Canister)
Causes:
- O-ring dry or damaged
- Housing not seated properly
- Crack in housing (rare)
Solutions:
- Lubricate O-ring (petroleum jelly)
- Reseat housing (ensure even pressure)
- Replace O-ring if cracked
- Replace filter if housing cracked
Problem: Filter Won't Prime (Canister)
Causes:
- Air leak in intake hose
- Impeller not seated properly
- Intake clogged
Solutions:
- Check all connections for leaks
- Reseat impeller
- Clear intake blockage
- Manually prime: Fill canister with water before starting
Problem: Cloudy Water Despite Filter
Causes:
- Bacterial bloom (new tank, normal)
- Dirty mechanical media
- Filter too small for bioload
Solutions:
- Wait (bacterial bloom clears in 3-7 days)
- Clean/replace mechanical media
- Upgrade filter if undersized
Problem: Ammonia/Nitrite Present Despite Filter
Causes:
- Filter too new (bacteria not established, takes 4-8 weeks)
- Biological media replaced recently
- Filter turned off (bacteria died)
- Overcleaning (removed bacteria)
Solutions:
- Patient (wait for cycling)
- Water changes + beneficial bacteria supplement
- Don't replace biological media
- Maintain filter properly (gentle cleaning only)
Advanced Filtration Techniques
Inline Equipment
What it is: Equipment installed on canister filter hoses
Common inline equipment:
Inline heater:
- Heater installed on output line
- Hidden (not in tank)
- Even heat distribution
- Cost: $40-80
Inline CO₂ diffuser:
- CO₂ dissolved in filter output
- Nearly 100% dissolution efficiency
- No equipment visible in tank
- Cost: $30-80
Inline UV sterilizer:
- Kills free-floating algae, parasites, bacteria
- Useful for green water or disease prevention
- Cost: $60-150
Advantages: Hidden equipment, improved efficiency
Disadvantages: Reduces filter flow slightly, more complex setup
Multiple Filter Configurations
Example 1: 75-gallon high-tech planted
- Main: Fluval 307 canister (spray bar)
- Supplemental: Medium sponge filter (gentle circulation, backup bio)
Example 2: 120-gallon heavily stocked
- Two Fluval 407 canisters (one each end)
- Even circulation across large tank
- Redundancy (if one fails)
Example 3: Nano shrimp tank (10 gallons)
- Small sponge filter (primary, shrimp-safe)
- No additional filtration needed
Custom Filter Media Mixes
Approach: Optimize media for specific needs
Example high-capacity bio setup:
- Layer 1 (bottom): Seachem Matrix (high-surface-area sintered glass)
- Layer 2-3: Ceramic rings (standard bio)
- Layer 4: Coarse sponge (mechanical)
- Layer 5: Fine floss (polishing, replace monthly)
Example budget effective:
- Layer 1: Pot scrubbers (high surface area, cheap)
- Layer 2-3: Sponges (bio + mechanical)
- Layer 4: Filter floss (polishing)
Experimentation encouraged within basic principle: Mechanical first, biological main body, polishing last.
FAQ
Do I need a filter if I have lots of plants?
Yes. While plants help process waste, they can't replace biological filtration for most setups. Filter provides essential beneficial bacteria habitat and circulation. Exception: Very heavily planted, very lightly stocked Walstad-method tanks (advanced).
Can I run two filters on one tank?
Yes. Multiple filters can improve circulation, increase biological capacity, and provide redundancy. Ensure combined flow doesn't exceed 5-6× tank volume (too much current).
How do I know if my filter is strong enough?
Signs of adequate filtration:
- Ammonia and nitrite at 0 ppm consistently
- Clear water
- Gentle circulation visible
Signs of inadequate filtration:
- Ammonia/nitrite present
- Cloudy water
- Dead zones (debris accumulation in corners)
Should I turn off my filter during water changes?
Not necessary. Most can run during water changes. Turn off only if water level drops below intake (causes dry running) or if cleaning impeller/inside of filter.
How often should I replace filter media?
Mechanical media: When falling apart (1-2 years) Biological media: Rarely, only if deteriorating (5-10+ years) Chemical media: 2-4 weeks (but don't use long-term in planted tanks)
Will my filter kill beneficial bacteria by removing them from water?
No. Beneficial bacteria form biofilm on surfaces (media, substrate, walls). They don't float freely in water column. Filter provides ideal habitat for bacteria to colonize.
Related Guides
Foundation:
Related Systems:
Final Principles
1. Biological filtration is non-negotiable. This is the filter's primary function. Everything else is secondary.
2. Flow rate: 3-5× tank volume per hour for planted tanks. Gentle circulation, not strong current. Plants prefer calm water.
3. Never replace biological media. You're throwing away months of bacterial colonization. Rinse gently in old tank water only if clogged.
4. Mechanical media: Rinse monthly. Biological media: Rinse every 2-3 months or less. Don't over-clean.
5. In CO₂ tanks, minimize surface agitation. Use spray bars or lily pipes. Position output horizontally.
6. Filter must run 24/7. Turning off kills bacteria. Never stop filter for extended periods.
7. Prefilter sponges are essential. Protects shrimp, reduces maintenance, catches large debris.
8. Match filter to tank size and bioload. Undersized = inadequate filtration. Oversized = too much current (adjustable flow helps).
Filtration is the life support system of your aquarium. Choose appropriate equipment, maintain it consistently, and let biology work. A well-maintained filter creates stable water chemistry, clear water, and healthy conditions for plants and fish to thrive.